![]()
Icinga is a fork of famous Ngaios monitoring tool, it is very compatible with Nagios and can be integrated with Nagios plugins. Icinga is very similar to Nagios, so you wont find any difficult in moving to Icinga. Icinga is one step ahead on multiple factors, the import factor is advanced reporting using we based jasper reports, the most improved web interface and its comes as virtual appliance.
This post will help you to setup Icinga on CentOS 7 / RHEL 7.
Prerequisites:
Before we go ahead, lets install the required packages for Icinga.
# yum -y install wget httpd mod_ssl gd gd-devel mariadb-server php-mysql php-xmlrpc gcc mariadb libdbi libdbi-devel libdbi-drivers libdbi-dbd-mysql |
Disable SELinux.
sed -i 's/SELINUX=enforcing/SELINUX=disabled/g' /etc/selinux/config |
Reboot once done.
Create icinga user and icinga-cmd group (allowing the external commands to be executed through the web interface) , add icinga and apache user to the part of icinga-cmd group.
# useradd icinga # groupadd icinga-cmd # usermod -a -G icinga-cmd icinga # usermod -a -G icinga-cmd apache |
Download latest Icinga source tarball.
# cd /tmp/ # wget http://downloads.sourceforge.net/project/icinga/icinga/1.10.1/icinga-1.10.1.tar.gz # tar -zxvf /tmp/icinga-1.10.1.tar.gz # cd /tmp/icinga-1.10.1 |
Compile and Install Icinga:
# ./configure --with-command-group=icinga-cmd --enable-idoutils # make all # make install # make install-init # make install-config # make install-commandmode # make install-webconf # make install-idoutils |
Configure Icinga:
Sample configuration files have now been installed in the /usr/local/icinga/etc/ directory. These sample files should work fine for getting started with Icinga. You’ll need to make just one change before you proceed. Edit the /usr/local/icinga/etc/objects/contacts.cfg config file with your favorite editor and change the email address associated with the nagiosadmin contact definition to the address you’d like to use for receiving alerts.
# vi /usr/local/icinga/etc/objects/contacts.cfg |
Change the Email address field to receive the notification.
email icinga@localhost |
to
email [email protected] |
Move sample idoutils configuration files to Icinga base directory.
# cd /usr/local/icinga/etc/ # mv idomod.cfg-sample idomod.cfg # mv ido2db.cfg-sample ido2db.cfg # cd modules/ # mv idoutils.cfg-sample idoutils.cfg |
Create database for idoutils:
# systemctl start mariadb.service # mysql -u root -p MariaDB [(none)]> CREATE DATABASE icinga; MariaDB [(none)]> GRANT USAGE ON icinga.* TO 'icinga'@'localhost' IDENTIFIED BY 'icinga' WITH MAX_QUERIES_PER_HOUR 0 MAX_CONNECTIONS_PER_HOUR 0 MAX_UPDATES_PER_HOUR 0; MariaDB [(none)]> FLUSH PRIVILEGES; MariaDB [(none)]> quit |
Import Database.
# mysql -u root -p icinga < /tmp/icinga-1.10.1/module/idoutils/db/mysql/mysql.sql |
Configure Web Interface:
Create a icingaadmin account for logging into the Icinga web interface. Remember the password that you assign to this user – you’ll need it later.
# htpasswd -c /usr/local/icinga/etc/htpasswd.users icingaadmin |
Restart Apache to make the new settings take effect.
systemctl restart httpd.service |
Download and Install Nagios Plugins:
Download Nagios Plugins to /tmp directory.
# cd /tmp # wget http://nagios-plugins.org/download/nagios-plugins-2.0.3.tar.gz # tar -zxvf /tmp/nagios-plugins-2.0.3.tar.gz # cd /tmp/nagios-plugins-2.0.3/ |
Compile and install the plugins.
# ./configure --prefix=/usr/local/icinga --with-cgiurl=/icinga/cgi-bin --with-nagios-user=icinga --with-nagios-group=icinga # make # make install |
Starting Icinga:
Verify the sample Icinga configuration files.
# /usr/local/icinga/bin/icinga -v /usr/local/icinga/etc/icinga.cfg |
If there are no errors, start Nagios and Idoutils.
# /etc/init.d/icinga start # /etc/init.d/ido2db start |
Start Icinga and Idoutils on system startup.
# chkconfig ido2db on # chkconfig icinga on # systemctl enable httpd.service # systemctl enable mariadb.service |
Access Web Interface:
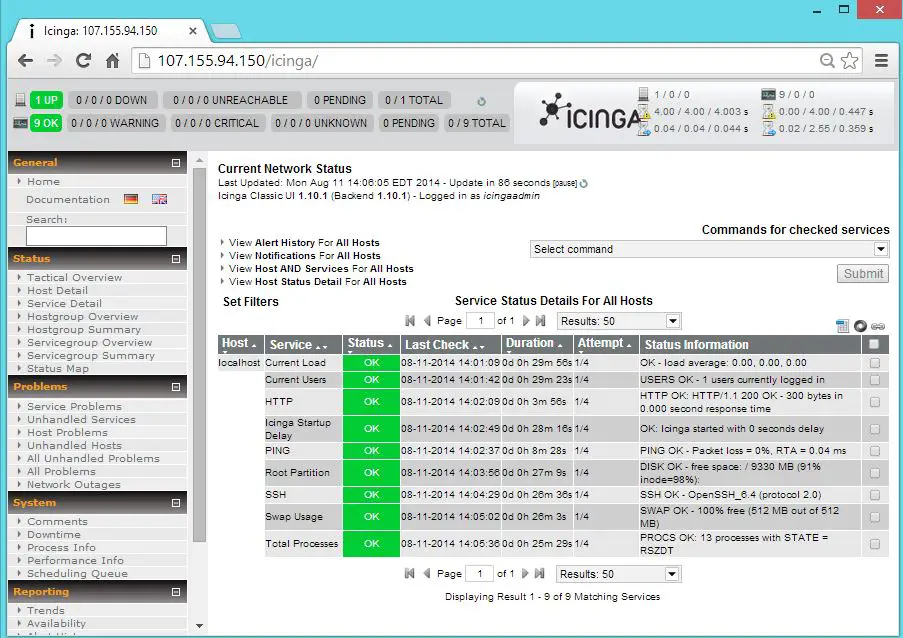
Now access Icinga web interface using the following URL. You’ll be prompted for the username (icingaadmin) and password you specified earlier.
http://ip-address/icinga/ |
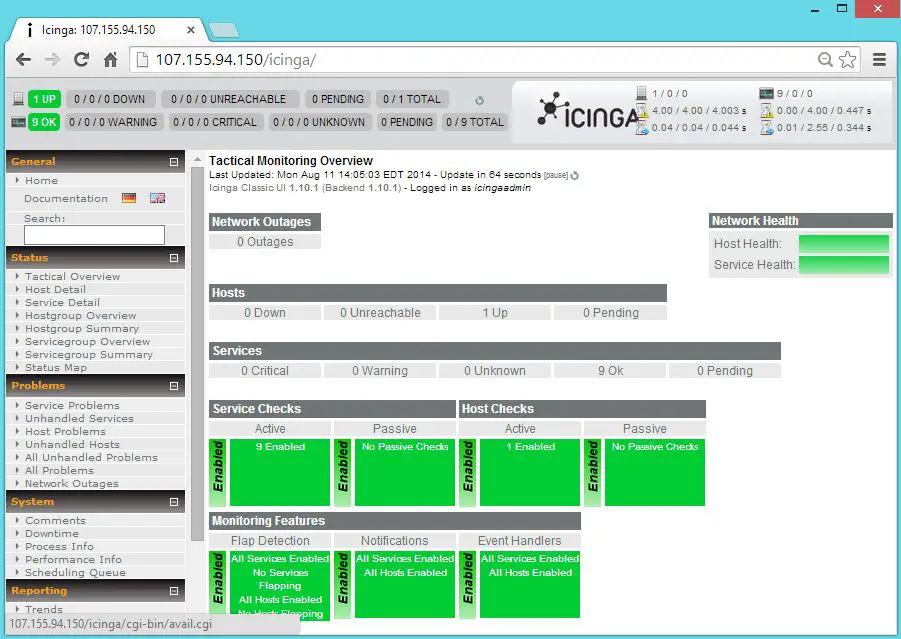
Click on service details to check the status.
Troubleshooting:
If you get any unknown waring for ping check.

please execute the following command in the terminal to resolve the issue.
# chmod u+s /bin/ping |
If you get any waring for httpd check.

Place index.html on document root.
# echo "Home Page" > /var/www/html/index.html |
That’s All!. You have successfully installed Icinga on CentOS 7 / RHEL 7