khanhnnvn

OpenStack Kilo on Ubuntu 14.04.2 – Configure KeyStone #2

 Virtualization  Comments Off on OpenStack Kilo on Ubuntu 14.04.2 – Configure KeyStone #2
Sep 072015
 
OpenStack Logo
OpenStack Logo

This is guide takes you to the second part of configuring OpenStack identity service on controller node, you can also go through the previous article on configuring KeyStone #1. Here we will be covering service entity and API end point creations.

Create the service entity and API endpoint:

To create the service entity and API endpoint, we have to export below variables to pass the value of authentication token.

# export OS_TOKEN=43405b090eda983ddde2  ## Replace this token (43405b090eda983ddde2 ) with OS_TOEKEN value from keystone.conf file.
# export OS_URL=http://controller:35357/v2.0  ## Replace controller with your controller ip.

Create the service entity for the Identity service.

# openstack service create --name keystone --description "OpenStack Identity" identity

+-------------+----------------------------------+
| Field       | Value                            |
+-------------+----------------------------------+
| description | OpenStack Identity               |
| enabled     | True                             |
| id          | c65841b4f8df478cbc19524c09fd9724 |
| name        | keystone                         |
| type        | identity                         |
+-------------+----------------------------------+

Verify the service.

# openstack service list
+----------------------------------+----------+----------+
| ID                               | Name     | Type     |
+----------------------------------+----------+----------+
| c65841b4f8df478cbc19524c09fd9724 | keystone | identity |
+----------------------------------+----------+----------+

Create the identity service API endpoint.

# openstack endpoint create \
--publicurl http://controller:5000/v2.0 \
--internalurl http://controller:5000/v2.0 \
--adminurl http://controller:35357/v2.0 \
--region RegionOne \
identity
+--------------+----------------------------------+
| Field        | Value                            |
+--------------+----------------------------------+
| adminurl     | http://controller:35357/v2.0     |
| id           | f402a9389d474c13a97a78a30f13c6e5 |
| internalurl  | http://controller:5000/v2.0      |
| publicurl    | http://controller:5000/v2.0      |
| region       | RegionOne                        |
| service_id   | c65841b4f8df478cbc19524c09fd9724 |
| service_name | keystone                         |
| service_type | identity                         |
+--------------+----------------------------------+

Verify the endpoint details.

# openstack endpoint list
+----------------------------------+-----------+--------------+--------------+
| ID                               | Region    | Service Name | Service Type |
+----------------------------------+-----------+--------------+--------------+
| f402a9389d474c13a97a78a30f13c6e5 | RegionOne | keystone     | identity     |
+----------------------------------+-----------+--------------+--------------+

Create projects, users, and roles:

Create a admin project, user and role for administration, we will use default domain for simplicity.

Create the admin project.

# openstack project create --description "Admin Project" admin
+-------------+----------------------------------+
| Field       | Value                            |
+-------------+----------------------------------+
| description | Admin Project                    |
| enabled     | True                             |
| id          | 9b05e6bffdb94c8081d665561d05e31e |
| name        | admin                            |
+-------------+----------------------------------+

Create the admin user.

# openstack user create --password-prompt admin
User Password:
Repeat User Password:
+----------+----------------------------------+
| Field    | Value                            |
+----------+----------------------------------+
| email    | None                             |
| enabled  | True                             |
| id       | 127a9a6b822a4e3eba69fa54128873cd |
| name     | admin                            |
| username | admin                            |
+----------+----------------------------------+

Create the admin role.

# openstack role create admin
+-------+----------------------------------+
| Field | Value                            |
+-------+----------------------------------+
| id    | 33af4f957aa34cc79451c23bf014af6f |
| name  | admin                            |
+-------+----------------------------------+

Add admin role to admin project and user.

# openstack role add --project admin --user admin admin
+-------+----------------------------------+
| Field | Value                            |
+-------+----------------------------------+
| id    | 33af4f957aa34cc79451c23bf014af6f |
| name  | admin                            |
+-------+----------------------------------+

Create the service project.

# openstack project create --description "Service Project" service
+-------------+----------------------------------+
| Field       | Value                            |
+-------------+----------------------------------+
| description | Service Project                  |
| enabled     | True                             |
| id          | 39e1b9944e564ceb9e71c98623b676cd |
| name        | service                          |
+-------------+----------------------------------+

Create the demo project to use for normal user.

#  openstack project create --description "Demo Project" demo
+-------------+----------------------------------+
| Field       | Value                            |
+-------------+----------------------------------+
| description | Demo Project                     |
| enabled     | True                             |
| id          | 909c4d7219c14a63aa0ef6f1ece18546 |
| name        | demo                             |
+-------------+----------------------------------+

Create the demo user.

# openstack user create --password-prompt demo
User Password:
Repeat User Password:
+----------+----------------------------------+
| Field    | Value                            |
+----------+----------------------------------+
| email    | None                             |
| enabled  | True                             |
| id       | 453ce23fa9f347b5baa53210aff7f207 |
| name     | demo                             |
| username | demo                             |
+----------+----------------------------------+

Create the user role.

# openstack role create user
+-------+----------------------------------+
| Field | Value                            |
+-------+----------------------------------+
| id    | fa78c101a7ed40b19de219e7d3eeda62 |
| name  | user                             |
+-------+----------------------------------+

Add the user role to demo project and user.

# openstack role add --project demo --user demo user
+-------+----------------------------------+
| Field | Value                            |
+-------+----------------------------------+
| id    | fa78c101a7ed40b19de219e7d3eeda62 |
| name  | user                             |
+-------+----------------------------------+

Verify operation:

# openstack project list
+----------------------------------+---------+
| ID                               | Name    |
+----------------------------------+---------+
| 39e1b9944e564ceb9e71c98623b676cd | service |
| 909c4d7219c14a63aa0ef6f1ece18546 | demo    |
| 9b05e6bffdb94c8081d665561d05e31e | admin   |
+----------------------------------+---------+
# openstack user list
+----------------------------------+-------+
| ID                               | Name  |
+----------------------------------+-------+
| 127a9a6b822a4e3eba69fa54128873cd | admin |
| 453ce23fa9f347b5baa53210aff7f207 | demo  |
+----------------------------------+-------+
# openstack role list
+----------------------------------+-------+
| ID                               | Name  |
+----------------------------------+-------+
| 33af4f957aa34cc79451c23bf014af6f | admin |
| fa78c101a7ed40b19de219e7d3eeda62 | user  |
+----------------------------------+-------+

Verify operation with role based access, to do that unset the exported variables.

# unset OS_TOKEN OS_URL

Execute the following command to list the roles as admin  user.

# openstack --os-auth-url http://controller:35357 --os-project-name admin --os-username admin --os-auth-type password  role list
Password:
+----------------------------------+-------+
| ID                               | Name  |
+----------------------------------+-------+
| 33af4f957aa34cc79451c23bf014af6f | admin |
| fa78c101a7ed40b19de219e7d3eeda62 | user  |
+----------------------------------+-------+

Execute the following command to list the roles as demo user, you should get below error.

# openstack --os-auth-url http://controller:35357 --os-project-name demo --os-username demo --os-auth-type password role list
Password:
ERROR: openstack You are not authorized to perform the requested action: admin_required (HTTP 403) (Request-ID: req-143ee967-4a26-4474-bf88-0b660354869d)

That’s all, you have successfully configured KeyStone on Ubuntu 14.04.2
OpenStack Kilo on Ubuntu 14.04.2 – Configure KeyStone #1

 Virtualization  Comments Off on OpenStack Kilo on Ubuntu 14.04.2 – Configure KeyStone #1
Sep 072015
 
OpenStack Logo
OpenStack Logo

Keystone is the OpenStack identity service, it provides the functionality of tracking users and their permissions; catalog functions via API endpoints. It doesn’t actually provide you any user management  functions, rather, it provides plug-in interfaces to choose between current authentication service or third-party identity services that are available on the market.

Before going ahead, take a look at our Infrastructure design in previous article.

This guide shows you how to install and configure OpenStack Identity service, code-named keystone, on the controller node.

Prerequisites:

Before installing OpenStack identity service, you must create a database and administration token.

# mysql -u root -p

create the keystone database.

CREATE DATABASE keystone;

Set proper access to keystone database.

GRANT ALL PRIVILEGES ON keystone.* TO 'keystone'@'localhost' IDENTIFIED BY 'PASSWD';
GRANT ALL PRIVILEGES ON keystone.* TO 'keystone'@'%' IDENTIFIED BY 'PASSWD';

Replace PASSWD with a suitable password.

Generate a random value and that can be used as an administration token for initial configuration.

# openssl rand -hex 10

Install and Configure KeyStone:

Disable keystone service from starting automatically after installation.

# echo "manual" > /etc/init/keystone.override

* In Kilo, Apache HTTP server is used to serve keystone requests on ports 5000 and 35357 with help of mod_wsgi instead of Eventlet which is depreciated in this version OpenStack.

Install keystone.

# apt-get install keystone python-openstackclient apache2 libapache2-mod-wsgi memcached python-memcache

Edit keystone configuration file.

# nano /etc/keystone/keystone.conf

Place the following entries in proper section of the above file.

[DEFAULT]
...
admin_token = 43405b090eda983ddde2 ## Replace 43405b090eda983ddde2 with a random that you generated earlier
verbose = True

[database]
...
connection = mysql://keystone:PASSWD@controller/keystone  ## Replace PASSWD with your KeyStone DB password
[memcache]
...
servers = localhost:11211
[token]
...
provider = keystone.token.providers.uuid.Provider
driver = keystone.token.persistence.backends.memcache.Token
[revoke]
...
driver = keystone.contrib.revoke.backends.sql.Revoke

Run the following command to populate the identity service database.

# keystone-manage db_sync

Configure Apache HTTP server:

Edit /etc/apache2/apache2.conf and configure ServerName option to reference the controller node.

ServerName controller

Create the below file.

# nano /etc/apache2/sites-enabled/wsgi-keystone.conf

Paste the following content on to above file.

Listen 5000
Listen 35357

<VirtualHost *:5000>
    WSGIDaemonProcess keystone-public processes=5 threads=1 user=keystone display-name=%{GROUP}
    WSGIProcessGroup keystone-public
    WSGIScriptAlias / /var/www/cgi-bin/keystone/main
    WSGIApplicationGroup %{GLOBAL}
    WSGIPassAuthorization On
    <IfVersion >= 2.4>
      ErrorLogFormat "%{cu}t %M"
    </IfVersion>
    LogLevel info
    ErrorLog /var/log/apache2/keystone-error.log
    CustomLog /var/log/apache2/keystone-access.log combined
</VirtualHost>

<VirtualHost *:35357>
    WSGIDaemonProcess keystone-admin processes=5 threads=1 user=keystone display-name=%{GROUP}
    WSGIProcessGroup keystone-admin
    WSGIScriptAlias / /var/www/cgi-bin/keystone/admin
    WSGIApplicationGroup %{GLOBAL}
    WSGIPassAuthorization On
    <IfVersion >= 2.4>
      ErrorLogFormat "%{cu}t %M"
    </IfVersion>
    LogLevel info
    ErrorLog /var/log/apache2/keystone-error.log
    CustomLog /var/log/apache2/keystone-access.log combined
</VirtualHost>

Create the directory for WSGI components.

# mkdir -p /var/www/cgi-bin/keystone

Run the following command to download WSGI components from upstream repository.

# curl http://git.openstack.org/cgit/openstack/keystone/plain/httpd/keystone.py?h=stable/kilo | tee /var/www/cgi-bin/keystone/main /var/www/cgi-bin/keystone/admin

Change ownership and permissions.

# chown -R keystone:keystone /var/www/cgi-bin/keystone
# chmod 755 /var/www/cgi-bin/keystone/*

Restart the Apache service.

# service apache2 restart

Remove SQLite database as we are using MySQL database.

# rm -f /var/lib/keystone/keystone.db

Next is to Create the service entity and API endpoints.

Install OpenStack Kilo on Ubuntu 14.04.2

 Virtualization  Comments Off on Install OpenStack Kilo on Ubuntu 14.04.2
Sep 072015
 
OpenStack Logo
OpenStack Logo

OpenStack is an open source cloud computing platform, provides solution for infrastructure as a service. OpenStack consists of multiple component put together for providing IaaS, components are listed below with its use.

Components:

COMPONENT NAME USE
Compute (Nova) Manages virtual machines
Object Storage (Swift) Manages storage across cloud
Block Storage (Cinder) Manages storage to compute instance
Networking (Neutron) Manages networking and ip addresses
Dashboard (Horizon) Provide graphical web interface to manage resources
Identity Service (Keystone) Manages authentication system across cloud
Image Service (Glance) Provides disk and server images (Template)
Telemetry (Ceilometer) Billing system
Orchestration (Heat) Provides orchestration function
Database (Trove) Database engine
Bare Metal Provisioning (Ironic) Provisions bare-metal system instead of virtual machine
Multiple Tenant Cloud Messaging (Zaqar) Cloud messaging service for Web developers
Elastic Map Reduce (Sahara) Provisions Hadoop clusters

Infrastructure Design:

As for as infrastructure is concern, we are going to use OpenStack networking (neutron), total of three Ubuntu instance will be used here, will act as Controller, Network and Compute Node.

OpenStack recommends below configurations for each node, with 64 bit host operating system.

• Controller Node: 1 processor, 2 GB memory, and 5 GB storage
• Network Node: 1 processor, 512 MB memory, and 5 GB storage
• Compute Node: 1 processor, 2 GB memory, and 10 GB storage

The following is the network configuration of each node.

ROLE NW CARD 1 NW CARD 2 NW CARD 3
CONTROLLER NODE 192.168.12.21 / 24, GW=192.168.12.2
(MANAGEMENT NETWORK)
NA NA
NETWORK NODE 192.168.12.22 / 24 GW=192.168.12.2
(MANAGEMENT NETWORK)
192.168.11.22 / 24
(TUNNEL NETWORK)
192.168.0.10 / 24 GW=192.168.0.1
(EXTERNAL NETWORK – DHCP ENABLED)
COMPUTE NODE 192.168.12.23 / 24 GW=192.168.12.2
(MANAGEMENT NETWORK)
192.168.11.23 / 24
(TUNNEL NETWORK)
NA

* Tunnel Network wont have a gateway ip in the configuration file, this network is used for internal communication between Network Node and Compute Node.

Add a host entry, so that nodes can use hostname to communicate instead of ip address. Place it on all nodes.

# nano ./etc/hosts

# controller
192.168.12.21 controller
# network
192.168.12.22 network
# compute
192.168.12.23 compute

Once you have done with configuring ip address, ping between nodes to verify the connectivity.

NTP Server:

Install and configure NTP on Controller Node so that all other nodes can do time sync.

# apt-get install ntp
# service ntp restart

Client NTP Configuration

Install NTP package on both Network and Compute node

# apt-get install ntp

Edit the below configuration file.

# nano /etc/ntp.conf

Remove other ntp servers from the file, just hash out the lines that are starts with word server. Add below entry to get our nodes sync with controller node.

server controller

Restart the NTP service.

# service ntp restart

OpenStack packages:

Install the Ubuntu Cloud archive keyring and repository.

# apt-get install ubuntu-cloud-keyring

# echo "deb http://ubuntu-cloud.archive.canonical.com/ubuntu" "trusty-updates/kilo main" > /etc/apt/sources.list.d/cloudarchive-kilo.list

Upgrade your system.

# apt-get update && apt-get dist-upgrade

Do the above two steps on all nodes.

Install MySQL database:

OpenStack components uses MySQL database to store information, so install MySQL on the Controller Node.

# apt-get install mariadb-server python-mysqldb

Installer invokes a command line tui to set MySQL root password.

# nano /etc/mysql/conf.d/mysqld_openstack.cnf

Add the following values and ensure bind-address value is set to management ip address of controller node to allow other node can access MySQL instance.

[mysqld]
## Set to Management IP
bind-address = 192.168.12.21
default-storage-engine = innodb
innodb_file_per_table
collation-server = utf8_general_ci
init-connect = 'SET NAMES utf8'
character-set-server = utf8

Restart the MySQL.

# service mysql restart

Install RabbitMQ:

RabbitMQ is used by OpenStack to coordinate operations and status information among services. Install it on controller node.

# apt-get install rabbitmq-server

Add openstack user.

# rabbitmqctl add_user openstack password

* Replace password with your own password.

Allow openstack user to read, write and configuration access.

# rabbitmqctl set_permissions openstack ".*" ".*" ".*"

Next is to configure KeyStone (OpenStack identity) service.

Install ONLYOFFICE – Open-Source Web Based Office Suite

 Solution  Comments Off on Install ONLYOFFICE – Open-Source Web Based Office Suite
Sep 072015
 

ONLYOFFICE is a free,multifunctional, web-based office suite that enables you to store and co-edit documents, manage projects, view email and customer relations at one place. It is developed for small and mid-size companies for an effective platform for business operations. ONLYOFFICE is current available in 21 languages, comprising viewers and editors for texts, spreadsheets and presentations, fully compatible with Office Open XML formats: .docx, .xlsx, .pptx and enabling collaborative editing in real-time.

Features:

  • Document Editor
  • Spreadsheet Editor
  • Presentation Editor
  • Documents application for iOS
  • Collaborative editing
  • Hieroglyph support
  • Support for all the popular formats: DOC, DOCX, TXT, ODT, RTF, ODP, EPUB, ODS, XLS, XLSX, CSV, PPTX, HTML

Integrating it with Community Server you will be able to:

  • view and edit files stored on Drive, Box, Dropbox, OneDrive, OwnCloud connected to ONLYOFFICE;
  • share files;
  • embed documents on a website;
  • manage access rights to documents.

Flavours:

ONLYOFFICE comes in two flavour,

  • ONLYOFFICE Free Edition, released in GNU Affero General Public License v.3.
  • ONLYOFFICE Enterprise Edition (Supported commercially by ONLYOFFICE).

System requirements:

  • RAM: 2 GB or more
  • CPU: 2 Core or better
  • Swap file: at least 2 GB
  • HDD: at least 40 GB of free space
  • Distributive: Ubuntu 12.04 or later
  • Docker: version 1.4.1 or later (If you are installing ONLYOFFICE on Docker)

Install ONLYOFFICE:

ONLYOFFICE can be installed in two ways,

1. Install ONLYOFFICE using Docker,

2. Install ONLYOFFICE using Repository.

Install ONLYOFFICE using Docker:

This docker installation will help you to set up full featured collaborative suite, instead of just document editor. You can also check what are all included in this suite here.

Before going ahead, you must install docker on your system. You can also go through steps to install docker on Ubuntu here.

Install phython-pip, it requires for installing docker-compose.

sudo apt-get install python-pip

Install docker-compose.

pip install -U docker-compose

Check version.

sudo docker-compose -v
docker-compose version: 1.4.0

Run following command to download latest docker images from official registry.

wget https://raw.githubusercontent.com/ONLYOFFICE/Docker-CommunityServer/master/docker-compose.yml

sudo docker-compose up -d

Excerpt of output.

Starting root_documentserver_1...
Starting root_mailserver_1...
Pulling communityserver (onlyoffice/communityserver:latest)...
latest: Pulling from onlyoffice/communityserver

Once it is downloaded, docker instance will be started automatically. Run the following command to check the status of images.

 docker ps

CONTAINER ID        IMAGE                        COMMAND                  CREATED             STATUS              PORTS                                                                                NAMES
4a664a15561e        onlyoffice/communityserver   "/bin/sh -c 'bash -C "   3 minutes ago       Up 2 minutes        443/tcp, 0.0.0.0:80->80/tcp, 5222/tcp                                                root_communityserver_1
77ec008a9971        onlyoffice/mailserver        "/bin/sh -c 'export C"   33 minutes ago      Up 10 minutes       0.0.0.0:25->25/tcp, 0.0.0.0:143->143/tcp, 3306/tcp, 0.0.0.0:587->587/tcp, 8081/tcp   root_mailserver_1
79c982ecf672        onlyoffice/documentserver    "/bin/sh -c 'bash -C "   46 minutes ago      Up 10 minutes       80/tcp, 443/tcp                                                                      root_documentserver_1

Access ONLYOFFICE Web console:

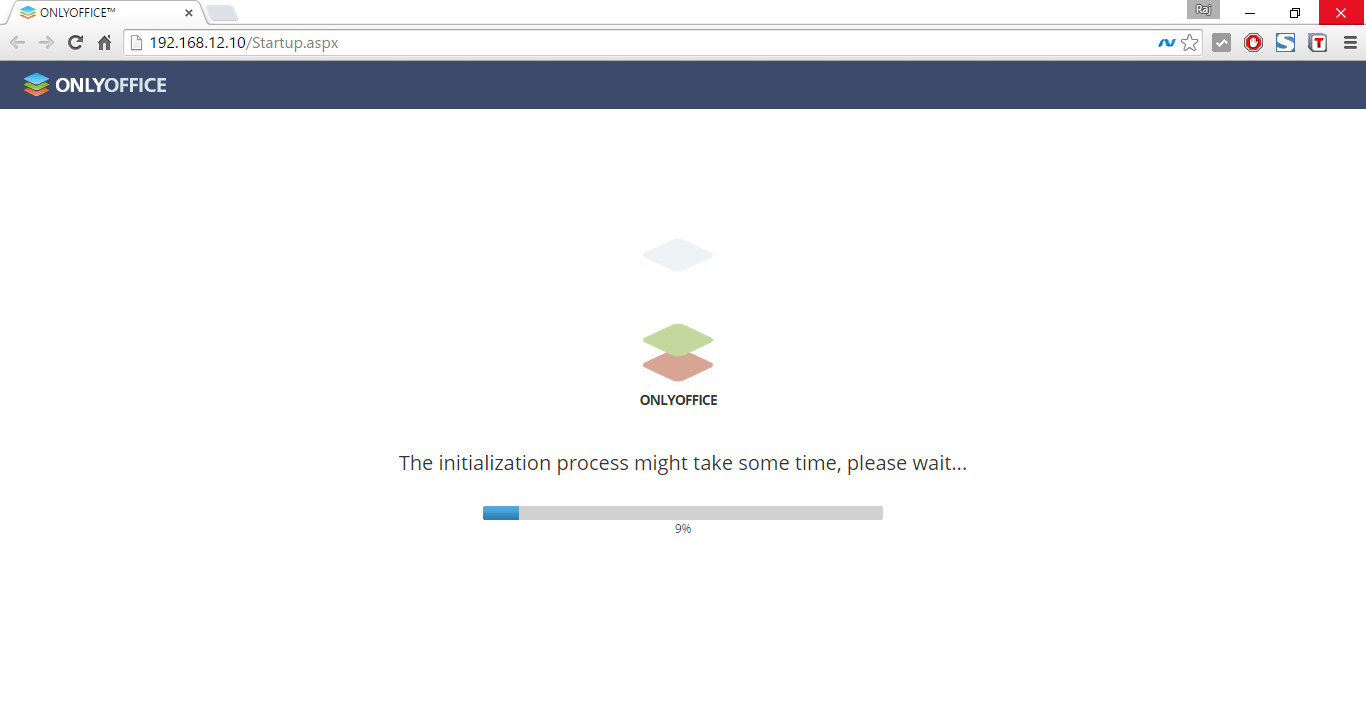
Open up a web browser and navigate to (http://ip-add-ress) address of your server. Please wait for few minutes to get ONLYOFFICE initialized.

Install Onlyoffice - Initialzing
Install Onlyoffice – Initialzing

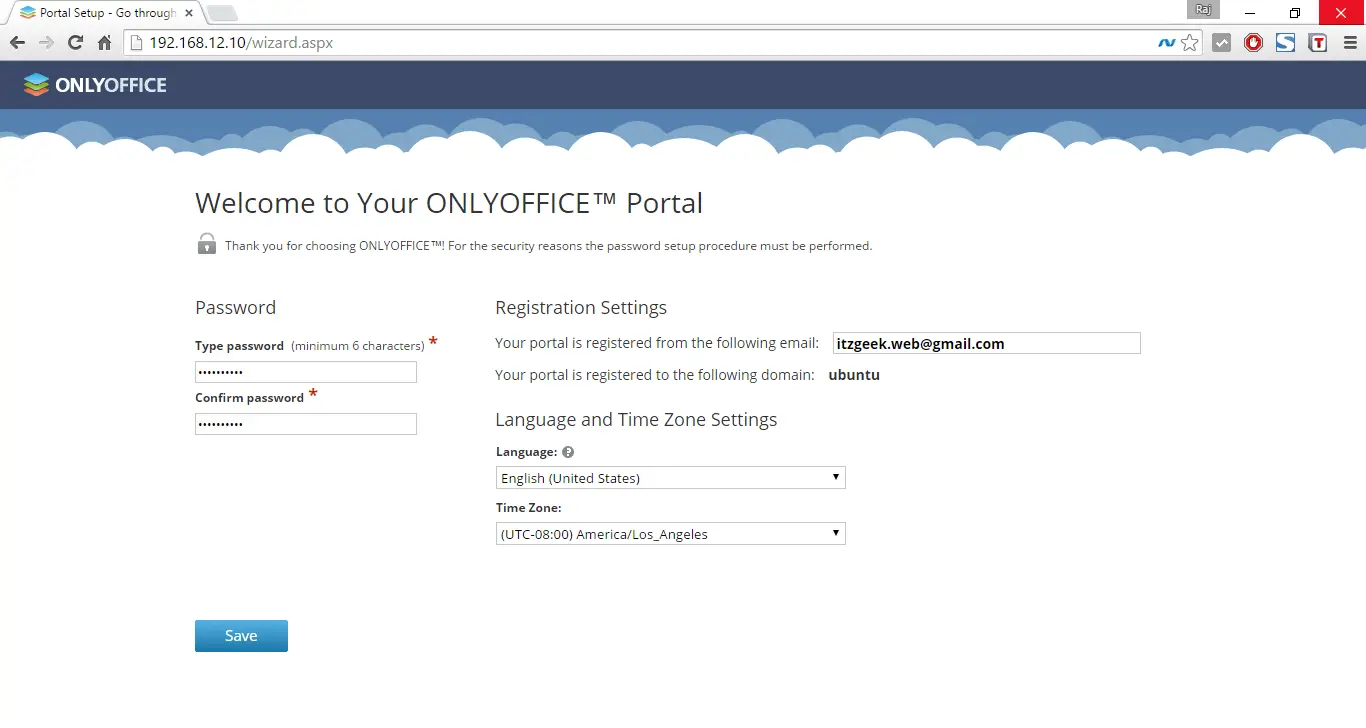
Fill up your details, along with password for portal.

Install Onlyoffice - Configuration
Install Onlyoffice – Configuration

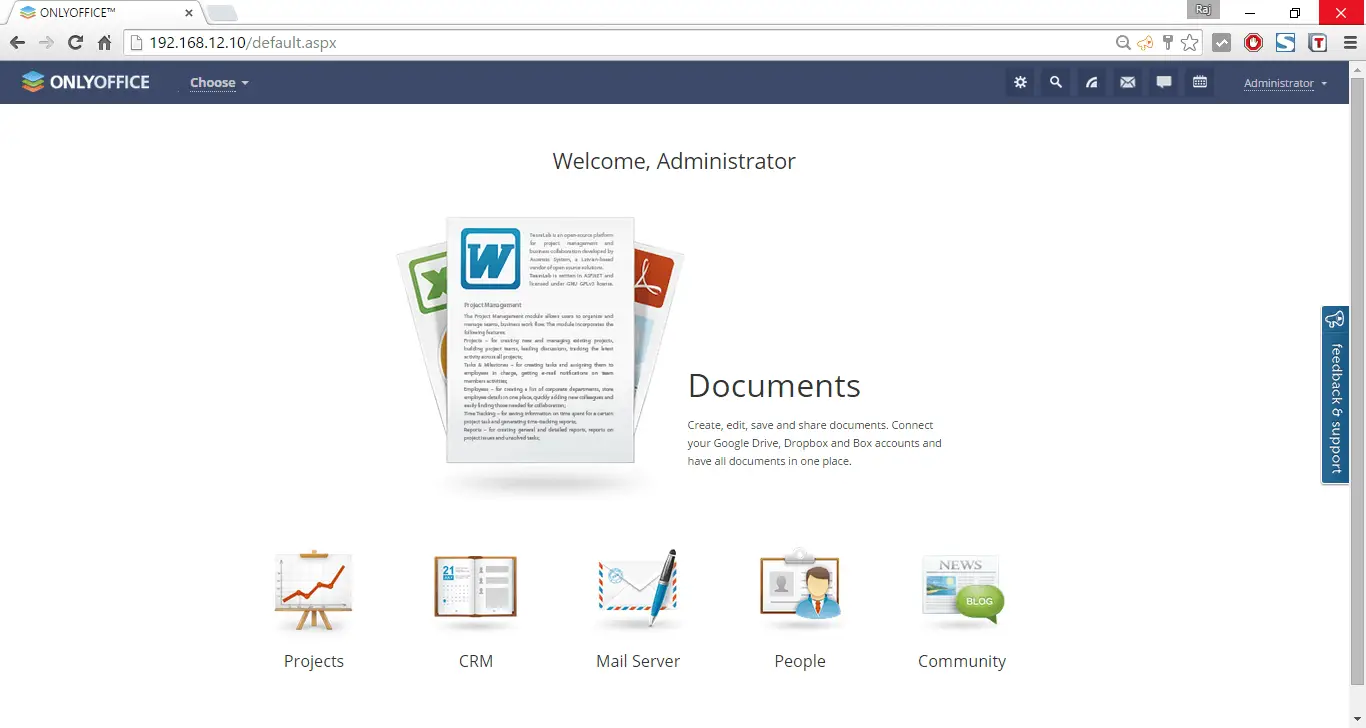
You will get below home page, click on respective modules. For example, if you click on Documents, you will be taken to Documents section.

Onlyoffice - Home
Onlyoffice – Home

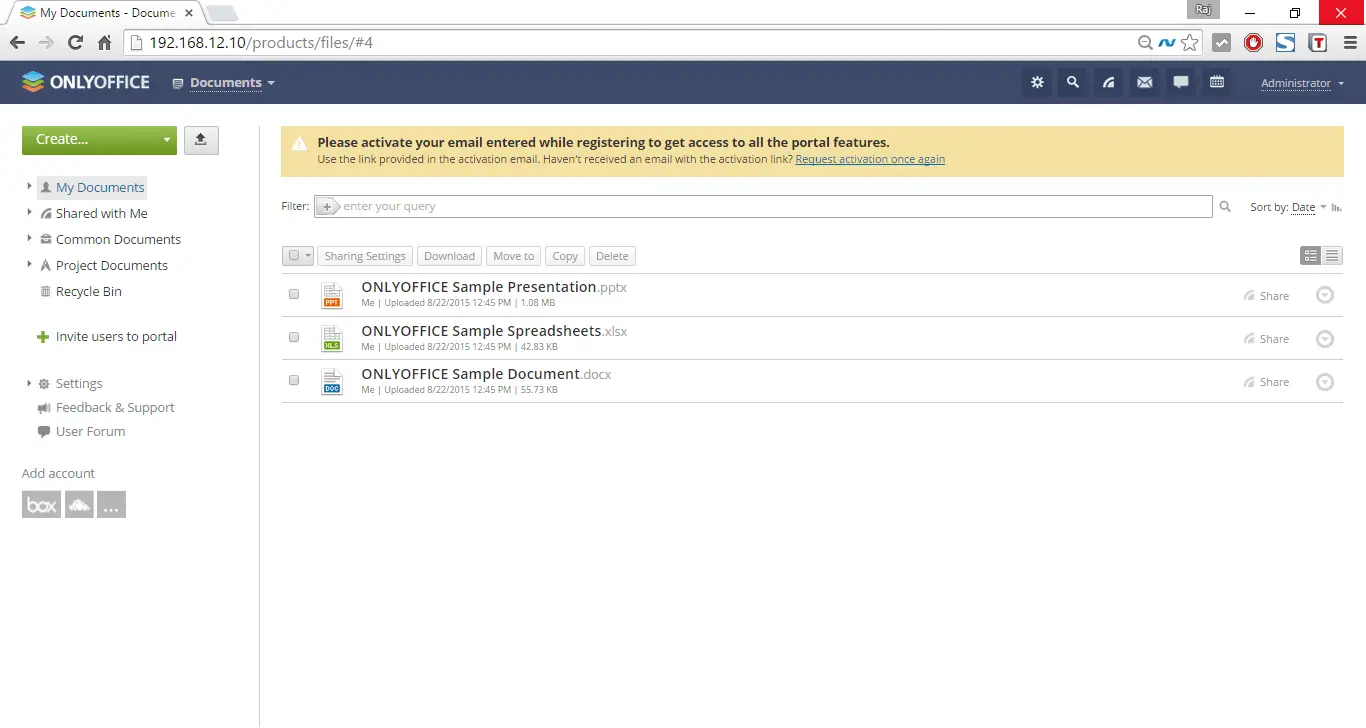
Here you can upload, create and edit the files. Also, you can connect your Google Drive, Dropbox and Box accounts and have all documents in one place.

Please note that you must activate your email entered while registering to get access to all the portal features.

Onlyoffice - Documents
Onlyoffice – Documents

For demo, i clicked on “ONLYOFFICE Sample Document.docx”; it took me to document editing page. The following screen shot shows how document editor will look like.

Onlyoffice - Documents Editor
Onlyoffice – Documents Editor

Spreadsheet editor;

Install Onlyoffice - Spreadsheet Editor
Install Onlyoffice – Spreadsheet Editor

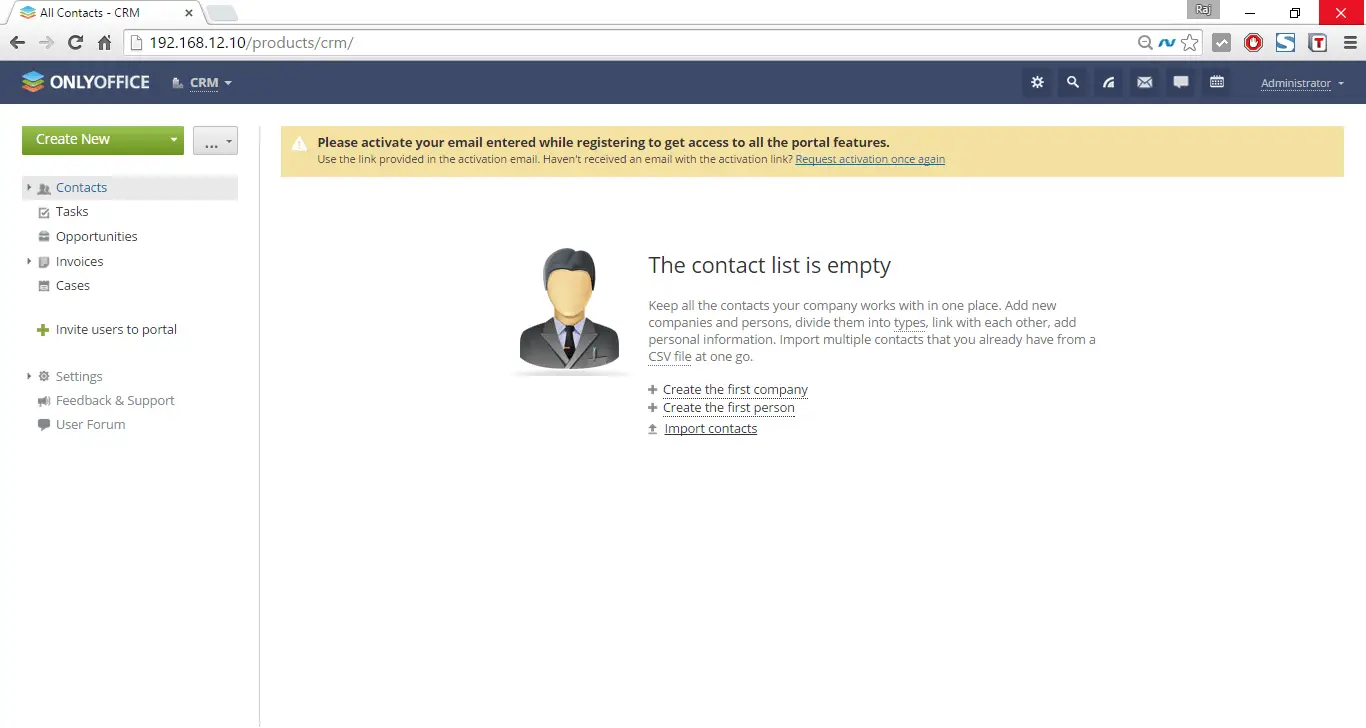
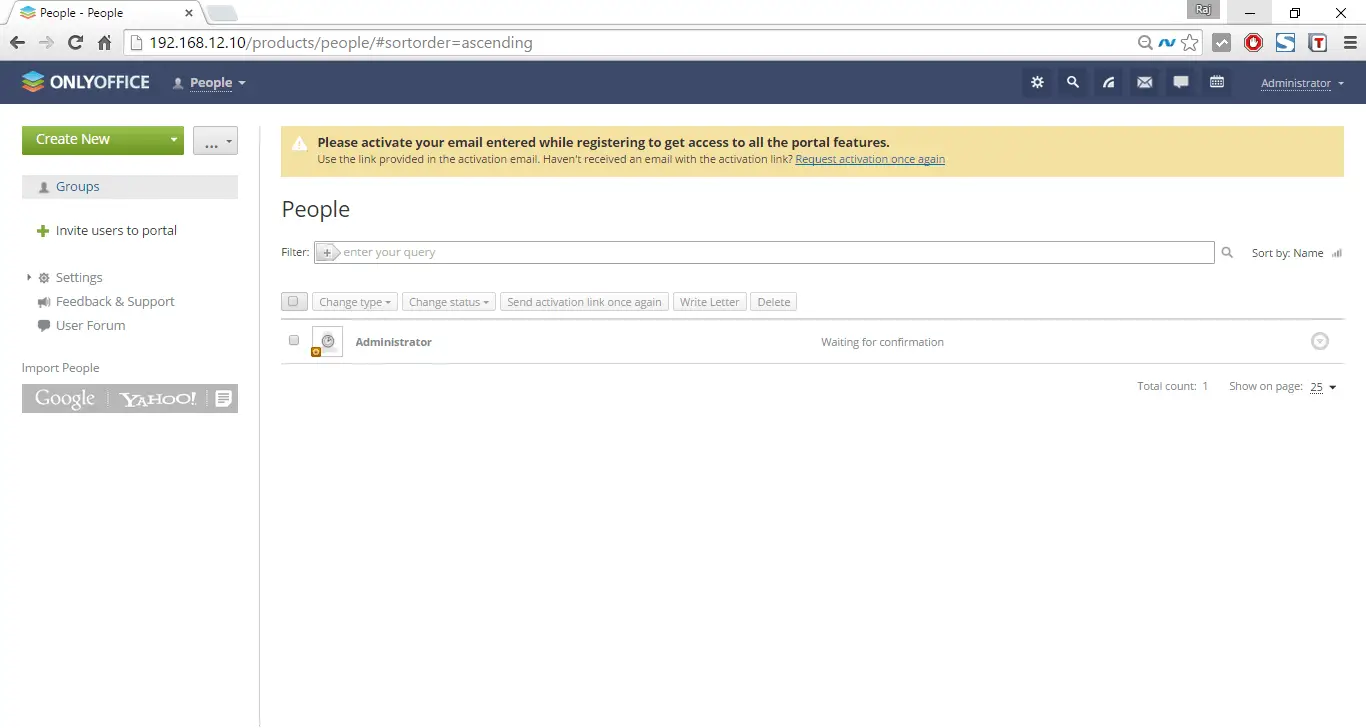
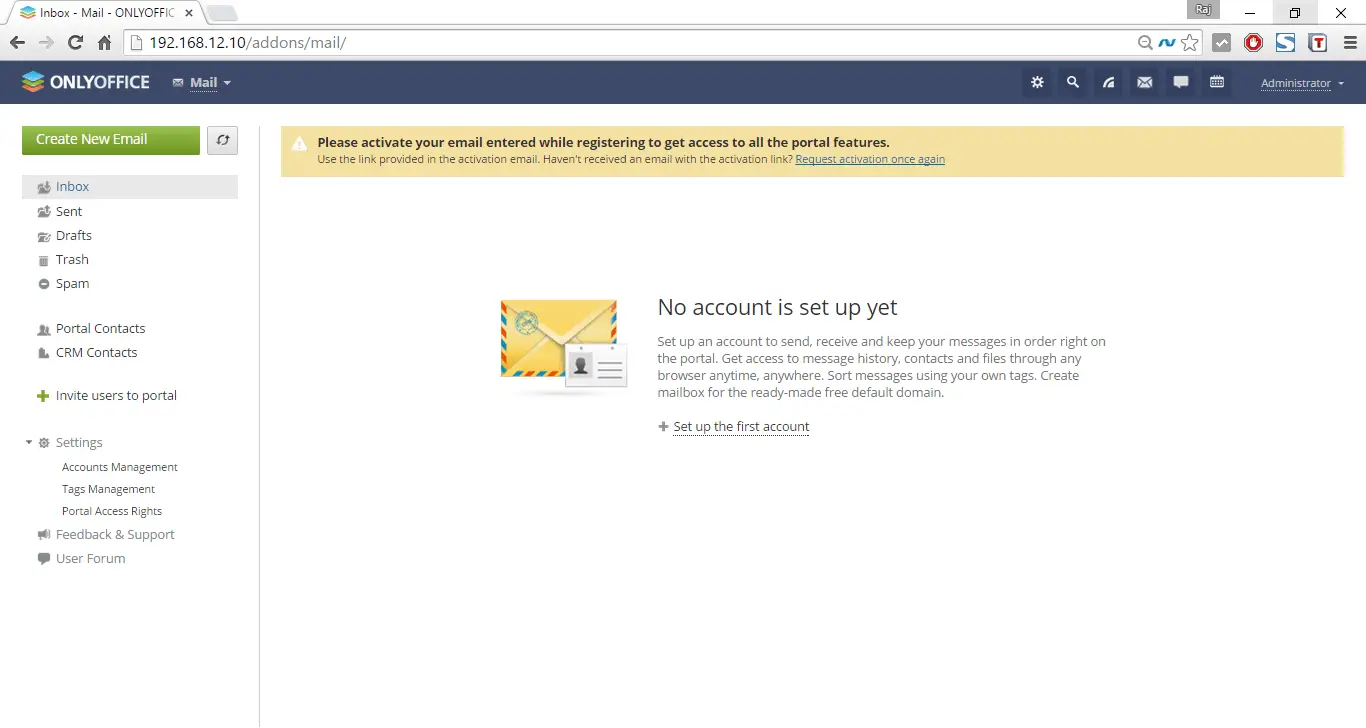
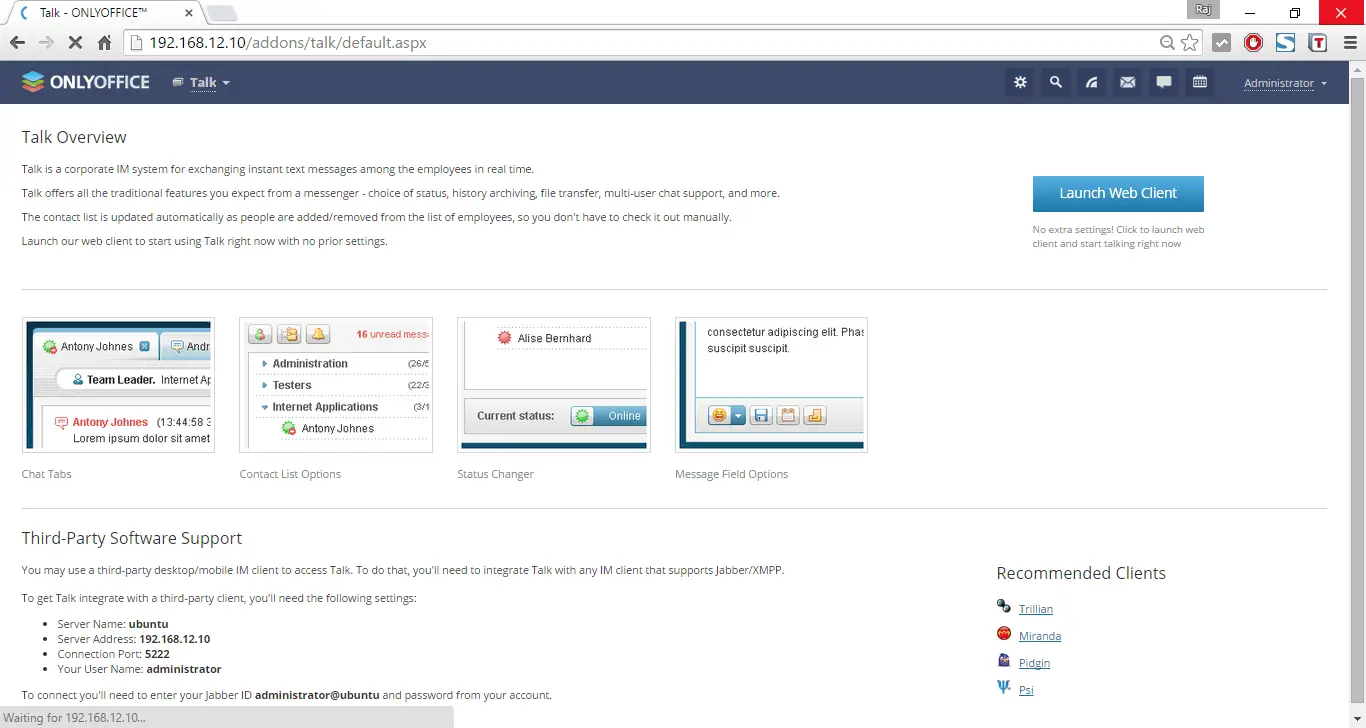
Other than document editing, you can setup the CRM, Mail server, create, manage projects and people’s etc.

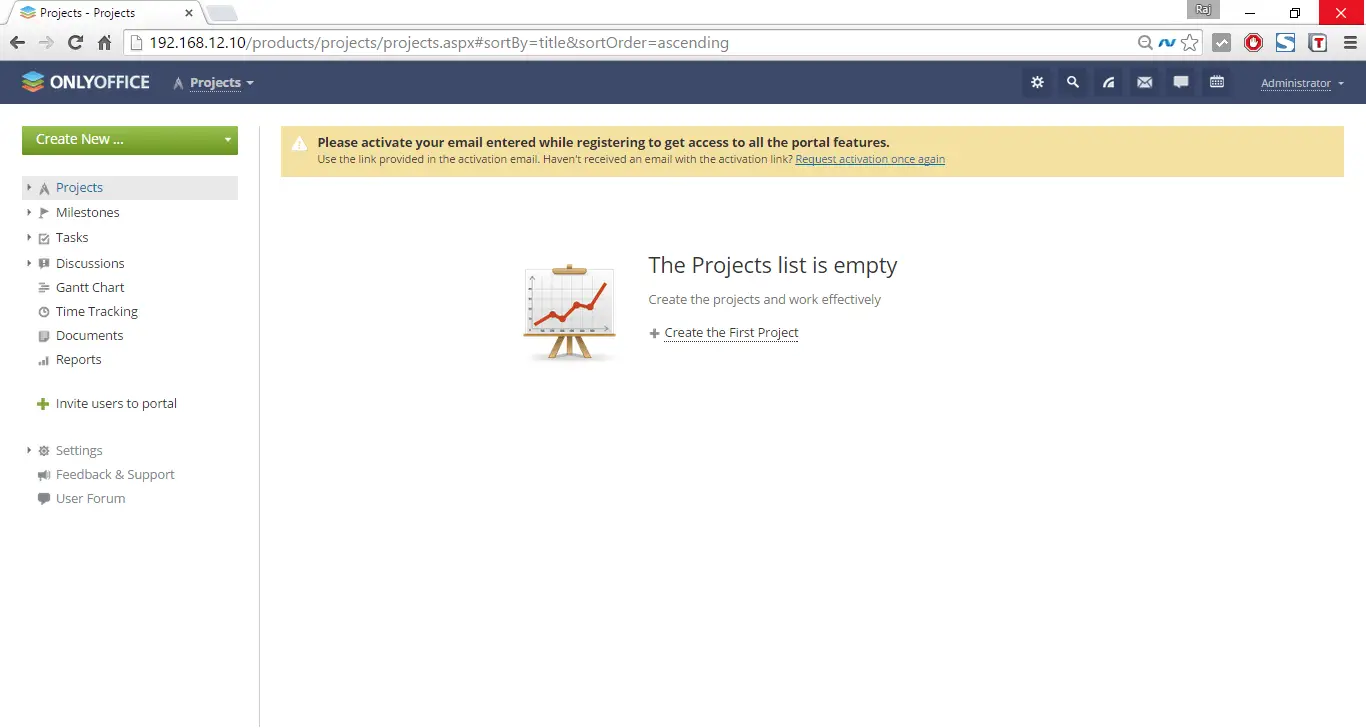
Projects:

Install Onlyoffice - Projects
Install Onlyoffice – Projects

CRM:

Onlyoffice - CRM
Onlyoffice – CRM

Community:

Onlyoffice -Community

People:

Onlyoffice - People
Onlyoffice – People

Mail:

Onlyoffice -  Mail
Onlyoffice – Mail

Talk:

Onlyoffice - Talk
Onlyoffice – Talk

Calender:

This is full featured collaborative suite runs on top of Docker, you can also set this up using repository.

Install ONLYOFFICE using Repository:

To install ONLYOFFICE from the official repository, you will need to download ONLYOFFICE GPG signing key:

sudo wget http://download.onlyoffice.com/repo/onlyoffice.key

And add it to the system:

sudo apt-key add onlyoffice.key

Add ONLYOFFICE repository to /etc/apt/sources.list file. Open this file using any available text editor.

sudo nano /etc/apt/sources.list

Add the following entry

deb http://download.onlyoffice.com/repo/debian squeeze main

Add repository to get up-to-date libstdc++6 package versions:

sudo add-apt-repository ppa:ubuntu-toolchain-r/test

Update repository:

sudo apt-get update

Install ONLYOFFICE from the repository execute the following command:

sudo apt-get install onlyoffice-documentserver

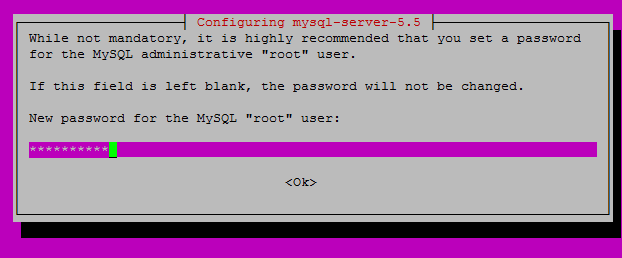
During installation, you will be asked to setup MySQL root user password.

Install OnlyOffice - MySQL Password
Install OnlyOffice – MySQL Password

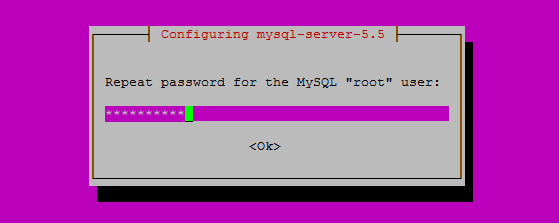
Re-enter the password.

Install OnlyOffice - Repeat MySQL Password
Install OnlyOffice – Repeat MySQL Password

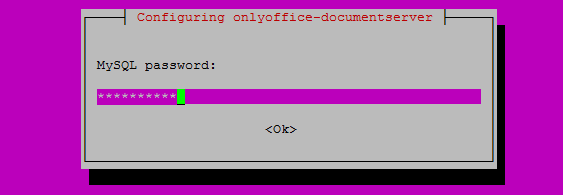
Enter password for ONLYOFFICE Document server database.

Install OnlyOffice - MySQL Password - Document Server
Install OnlyOffice – MySQL Password – Document Server

Accept the license agreement of MS fonts.

Install OnlyOffice - EULA MS Fonts
Install OnlyOffice – EULA MS Fonts
Install OnlyOffice - Agree EULA MS Fonts
Install OnlyOffice – Agree EULA MS Fonts

That’s it. ONLYOFFICE has been installed.

Access ONLYOFFICE Web console:

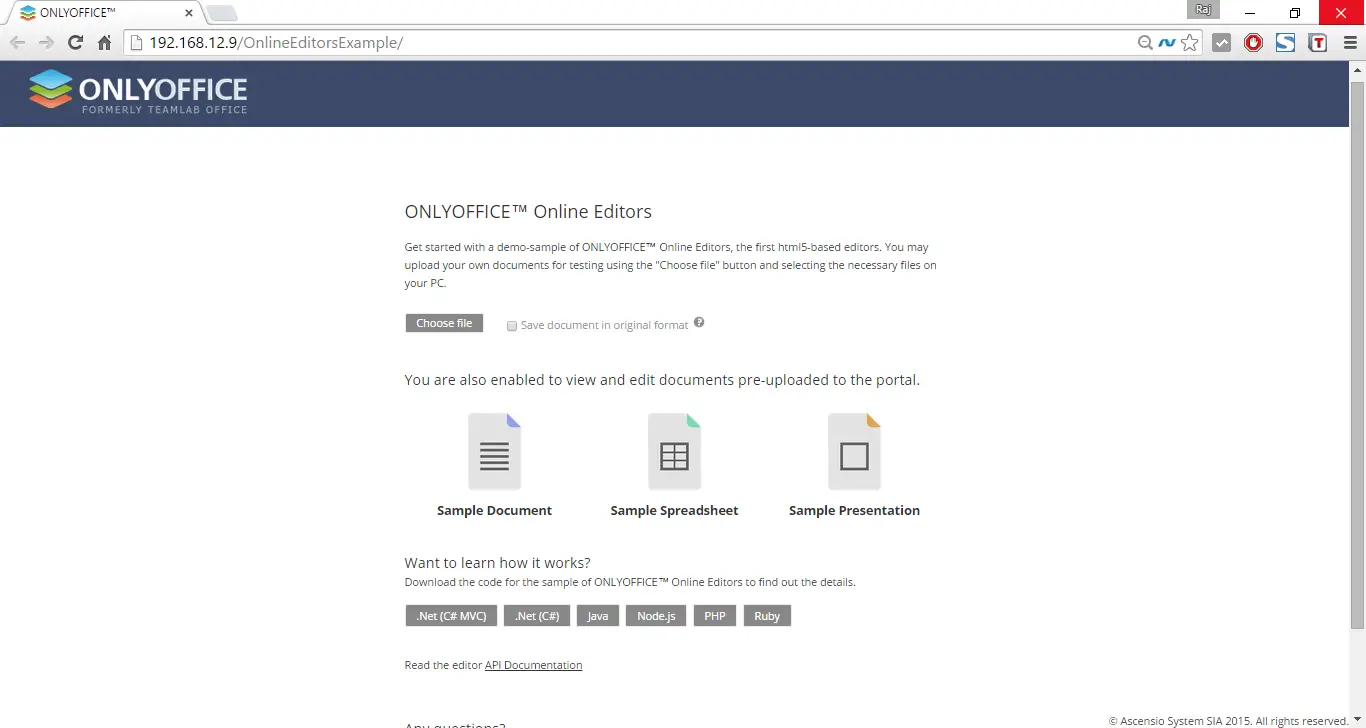
Open up your web browser and navigate to http://ip-add-ress/. You should see the following screen.

Onlyoffice - Documets Home
Onlyoffice – Documets Home

Now, you can start using the Document server. From now you can use the ONLYOFFICE online editors to create, edit, view, and delete word documents, excel sheets, and presentation files etc.

ONLYOFFICE can be easily integrated into your website or cloud application via API provided. So you get a chance to provide users with the most advanced online document editors for text docs, spreadsheets and presentations.

To upload a new document, click “Choose file” button and select the files on your PC.

Onlyoffice - Documets Upload Files and with conversion
Onlyoffice – Documets Upload Files and with conversion

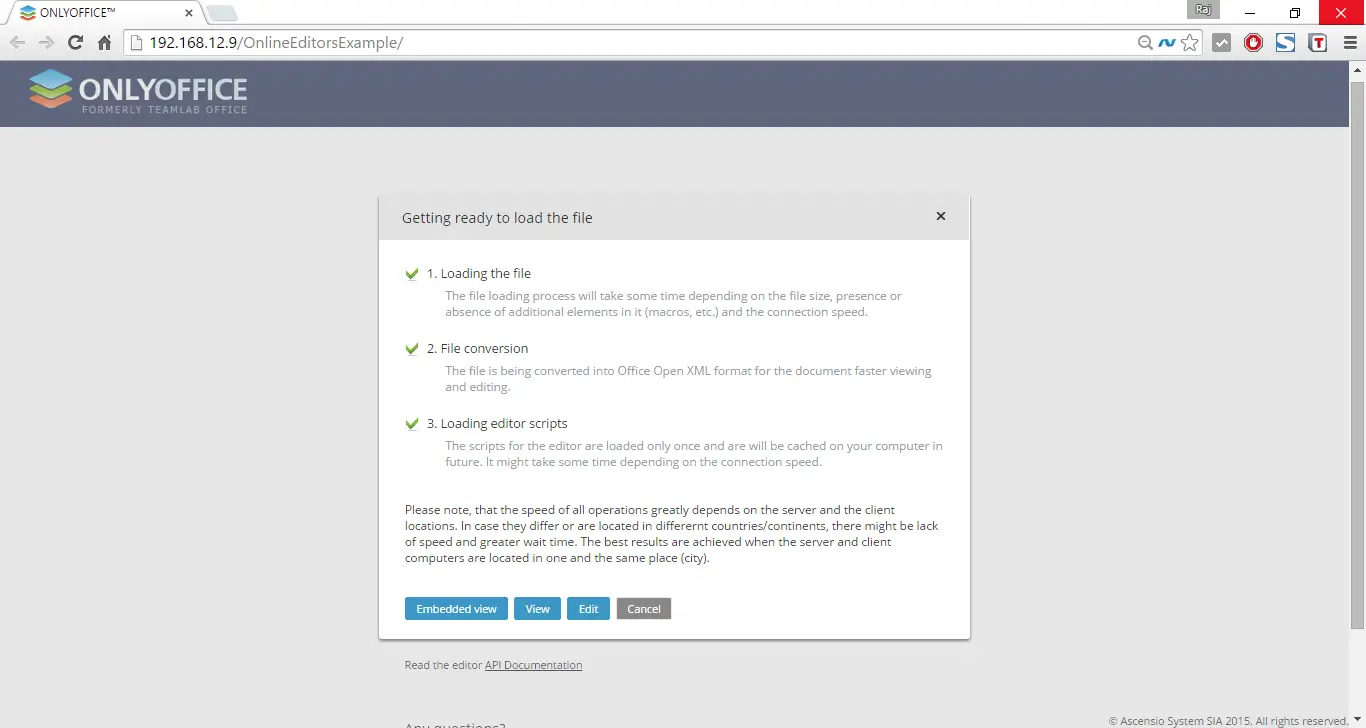
Now, you can view or edit the uploaded document. The following screen shows how document editor looks like.

Onlyoffice - Documents Editing
Onlyoffice – Documents Editing

To edit the document, click the Edit button in the web console, make the changes and click the save button.

How to use Linux as router

 Linux  Comments Off on How to use Linux as router
Sep 072015
 

Linux as a Router

In this practical we are using three computers. One Linux system will be use for routing and reset two will remain in two different networks. First we will configure the system which is going to play the role of router.

How to create virtual LAN card

Configure server system

You need two LAN card for routing between two networks or you can create virtual LAN card instead of deploying them physically.

To create virtual Ethernet card change directory to /etc/sysconfig/network-scripts

change directory network script

ifcfg-eth0 is the necessary script file for Ethernet 0. Copy this file to the same folder to create new virtual LAN cards.

cp eth0 eth0.1

Now on this newly created virtual LAN card. It could be done by service network restart

service network restart

Run setup command and select network configuration sub window from list

setup

You have two LAN card here, select eth0 from list to assign IP

select eh0

This Ethernet card will be the default gateway of first network set its IP to 192.168.1.254 and click on ok

assign ip

Now select eth0.1 ( This our virtual LAN card which we create in our last sections)

select eth1

Set its IP to 192.168.0.254 This will be the default gateway of other network. Click on OK then quit and quit to come back on command prompt

assign ip eth1

IP forwarding can be enabled by editing in /etc/sysctl.conf file. open this file

vi /etc/sysctl.conf

Locate the net.ipv4. ip_forward = 0 tag. and replace the value 0 to 1. This will enable IP forwarding to permanently . But this require a system reboot.

change value sysctl.conf

If don’t want to restart the system you can tell running kernel directly by echo command and kernel will enable the IP forwarding

echo command

now configure our client system. we are using two system one from each network to test the connectivity .

Our first system is a Linux machine run setup command on it

setup commands

assign its IP address to 192.168.0.1 with a default gateway of 192.168.0.254

assign IP address

now restart the network service and check connectivity form its default gateway ( Server IP)

ping

Now go on our other host which we are using a window machine ( You can also use Linux host ) and set IP address to 192.168.1.1 with a default gateway to 192.168.1.254

ip configurations

now open command prompt and test connectivity with default gateway

ping commands

At this point you have completed all necessary step’s to enable routing its time to verify this

Test from windows system

ping the Linux host located on other network

ping replay

Test from Linux system

ping the Window host located on other network

ping replay

How to configure FTP Server in Linux

 Linux  Comments Off on How to configure FTP Server in Linux
Sep 072015
 

Three rpm are required to configure ssh server. vsftpd, portmap, xinetd check them if not found then install
rpm

Now check vsftpd, portmap, xinetd service in system service it should be on

 #setup
 Select  System service from list
 [*]portmap
 [*]xinetd
 [*]vsftpd 

Now restart xinetd and portmap and vsftpd service
service restart
service vsftpd restart
To keep on these services after reboot on then via chkconfig command
chkconfig
After reboot verify their status. It must be in running condition
service status

Create a normal user named vinita
useradd

Login for this user on other terminal and create a test file
create file

On Linux client

ping from ftp server and run ftp command and give username and password
user login ftp server
after login you can download files from the specified directories

Most commonly commands used on ftp prompt are

put  To upload files on server
get  To download files from server
mput To upload all files
mget To download all files
?    To see all available command on ftp prompts
cd   To change remote directory
lcd  To change local directory.

help commands on ftp server

On window clients

Now go on window clients and create a file. copy con command is used to create files on window. To save use CTRL+Z
copy con

Now ping from ftp server and invoke ftp session from server, login from user account and download as well as uploads files
user login on window system

Enable root account for ftp session and set permission on user

By default on vsftpd server root account is disable. You cannot login from root account.
deny root for ftp sessions

Now we will enable root account for ftp session and same time we will disable our normal user vinita to use ftp sessions.

open file /etc/vsftpd/ftpusers . Users whose name are set in this file will not allowed to login from ftp.
vi ftpuser
ftp user

By default this file have an entry for root that why root are not allowed to use ftp. remove root from list and add user vinita
ftp user

Now remove entry form /etc/vsftpd/user_list files. Users whose names are set in this file are also not allowed to login from ftp even they are not prompt for password.

userlist
By default this file have an entry for root that way root is denied form login even not asked for password remove root from list and add user vinita
userlist

After saving change in these files restart the vsftpd service
service vsftpd restart

Now go on client system and login from root this time root will login
root login

Now try to login form user vinita she should not prompt form password also

How to set login banner for ftp server

To set login banner open /etc/vsftpd/vsftpd.conf file and search for this tag
banner
Uncomment this tag and set your banner and save file , and restart the vsftpd service
banner

Go on client system and check banner it will appear before user login

Cài đặt memcache, memcache PHP extension (Linux)

 Hệ thống  Comments Off on Cài đặt memcache, memcache PHP extension (Linux)
Sep 042015
 
cropped-Screenshot_4.pngBài viết hướng đẫn cài đặt Memcached, thư viện để php có thể kết nối tới memcached.


Bước 1

Download libevent , cài đặt :
#tar -xvf libevent-1.3b.tar.gz
#cd libevent-1.3b
#./configure
#make
#make install;
Bước 2
Download memcache, cài đặt :
#gunzip memcached-1.2.1.tar.gz
#tar -xvf memcached-1.2.1.tar
#cd memcached-1.2.1
#./configure
#make
#make install;
Bước 3
Tạo liên kết cho memcache :
#ln -s /usr/local/lib/libevent-1.3b.so.1 /lib/libevent-1.3b.so.1
memcached -d -u nobody -m 512 127.0.0.1 -p 11211
Bước 4
Cài đặt gói pecl cho PHP (memcache PHP extension):
#wget http://pecl.php.net/get/memcache-2.1.2.tgz
#gzip -df memcache-2.1.2.tgz
#tar -xvf memcache-2.1.2.tar
#cd memcache-2.1.2
#phpize (Chú ý)
#./configure
#make
#make install
Chú ý : khi gõ lệnh #phpize có thể sẽ gặp lỗi như sau :
“Cannot find autoconf. Please check your autoconf installation”
Lỗi này là do bạn chưa install autoconf trên hệ thống. Bạn cần cài đặt autoconf và m4 cho hệ thống
Cách làm như sau:
# cd /usr/src
# wget http://ftp.gnu.org/gnu/m4/m4-1.4.9.tar.gz
# tar -zvxf m4-1.4.9.tar.gz
# cd m4-1.4.9/
# ./configure
# make
# make install
# cd ../
# wget http://ftp.gnu.org/gnu/autoconf/autoconf-2.62.tar.gz
# tar -zvxf autoconf-2.62.tar.gz
# cd autoconf-2.62/
# ./configure
# make
# make install
Sau đó bạn có thể configure và install memcache PHP extension bình thường.
Bước 5
Tìm file php.ini, memcache.so bằng lệnh :
#whereis php.ini
#whereis memcache.so
Nó sẽ chỉ đường dẫn vào cả 2 file. Mở file php.ini.
Vào thư mục chứa file, gõ lệnh :
#nano php.ini
thêm câu lệnh sau vào file php.ini :
extension = /path/memcache.so
path là đường dẫn trực tiếp vào file memcache.so.
Trên đây là tất cả các bước cần thiết để cài đặt memcache cho hệ thống.
Chúc mọi người thành công

Tối ưu Nginx

 Hệ thống  Comments Off on Tối ưu Nginx
Sep 042015
 
I – Tối ưu Nginx:
1) B trí li các tp tin cu hình:
Thông thưng thì các tp tin cu hình ca Nginx s đưc lưu tr trong thư mc /etc/nginx. Mt cách t chc li vic lưu tr  tt hơn theo phong cách ca Apache như sau
## Tp tin cu hình chính ##/etc/nginx/nginx.conf## Tp tin cu hình các virtual host ##/etc/nginx/sites-available//etc/nginx/sites-enabled/ ## Các tp tin cu hình khác… ##/etc/nginx/conf.d/
Phn tp tin cu hình virtual host s có 2 thư mc chính:
  • sites-available: Cha danh sách các file cu hình khác nhau như: file cu hình hoàn chnh, file cu hình tm thi, file cu hình li,Lưu tr nhng tp tin cu hình mà ta hin có.
  • sites-enabled: Cha danh sách các symbolic link tr ti các tp tin cu hình hoàn chnh, đã ti ưu thư mc sites-available.
Vì chúng ta tách bit phn file cu hình ca các virtual host ra lưu tr riêng nên ta cn phi include dòng đa chthư mc lưu tr các file cu hình này vào file cu hình chính. filenginx.conf ta thêm vào
## Tp tin cu hình virtual host. ##include /etc/nginx/sites-enabled/*; ## Các tp tin cu hình khác…/ ##include /etc/nginx/conf.d/*;
Chú ý: Vic ti ưu li cách sp xếp này giúp chúng ta d dàng qun lý h thng webserver hơn ch không có tác dng ti hiu sut ti hiu sut.
2) Ti ưu worker_processes:
Vi cu hình mc đnh, Nginx s s dng mt CPU đ x lý các tác v ca mình. Tùy theo mc đ hot đng ca web server mà chúng ta có th thay đi li thiết lp này. Ví d vi các web server hay s dng v SSL, gzip thì ta nên đt ch s cworker_processes này lên cao hơn. Nếu website ca bn có sng các tp tin tĩnh nhiu, và dung lưng ca chúng ln hơn b nh RAM thì vic tăng worker_processes s ti ưu băng thông đĩa ca h thng.
Đ xác đnh s cores ca CPU ca h thng ta có th thc hin lnh
# cat /proc/cpuinfo | grep processor
[root@server ~]# cat /proc/cpuinfo | grep processorprocessor    : 0processor    : 1processor    : 2processor    : 3
Như trên, CPU ca chúng ta có 4 cores. Đ thay đi mc s dng CPU ca nginx ta sa tp tin cu hình chính
# vi /etc/nginx/nginx.conf
Ti dòng s 3 ta thay đi giá tr cworker_processes là 4.
nginx-php-fpm-config-2
3) Ti ưu worker_connections:
worker_connections s cho biết sng connection mà CPU s x lý. Mc đnh, sng connection này đưc thiết lp là 1024. Đ xem v mc gii hn s dng ca h thng bn có th dng lnh ulimit
# ulimit –n
nginx-php-fpm-config-3
Con s thiết lp cworker_connections nên nh hơn hoc bng gii hn này!
Nếu bn đã điu chnh li giá tr worker_processes giúp Nginx s dng nhiu cores đ x lý các tác v hơn thì có th thêm dòng cu hình sau đ tăng sng clients lên cao nht
max_clients = worker_processes * worker_connections
4) Ti ưu buffers (b nh đm):
Mt trong nhng cu hình quan trng đ ti ưu Nginx là thiết đt các giá tr buffer. Nếu bn thiết lp b nhbuffer quá nh thì s d dn ti tình trng tht c chai khi web server ca chúng ta tiếp nhn mt lưng traffic ln. Đ thay đi các giá tr buffer này, chúng ta có th thêm vào các dòng cu hình th http ca file cu hình chính nginx.conf
client_body_buffer_size 8K; client_header_buffer_size 1k; client_max_body_size 2m; large_client_header_buffers 2 1k;
Trong đó:
  • client_body_buffer_size: Thiết đt giá tr kích thưc ca body mà client yêu cu. Nếu kích thưc đưc yêu cu ln hơn giá tr buffer thì s đưc lưu vào temporary file.
  • client_header_buffer_size: Thiết đt giá tr kích thưc ca header mà client yêu cu. Thông thưng thì kích thưc này 1K là đ.
  • client_max_body_size: Thiết đt giá tr kích thưc ti đa ca body mà client có th yêu cu đưc, xác đnh bi dòng Conent-Length trong header. Nếu kích thưc body yêu cu vưt gii hn nãy thì client s nhn đưc thông báo li “Request Entity Too Large” (413).
  • large_client_header_buffers: Thiết đt giá tr kích v sng và kích thưc ln nht ca buffer dùng đ đc các headers có kích thưc ln t các request ca client. Nếu client gi mt header quá ln Nginx s tr v li Request URL too large (414) hoc Bad request (400) nếu header ca request quá dài.
Ngoài ra chúng ta cũng cn thiết đt li các giá tr timeout đ ti ưu hiu sut hot đng ca web server vi các client
client_body_timeout     10; client_header_timeout   10; keepalive_timeout       15; send_timeout            10;
Trong đó:
  • client_body_timeout: Thiết đt thi gian ti body ca webpage t client. Nếu quá thi gian này, client s nhn thông báo tr v “Request time out” (408).
  • client_header_timeout: Thiết đt thi gian ti title ca webpage t client. Nếu quá thi gian này, client s nhn thông báo tr v “Request time out” (408).
  • keepalive_timeout: Thiết đt thi gian sng ca kết ni t client, nếu quá thi gian này thì kết ni s b đóng.
  • send_timeout: Thiết đt thi gian phn hi d liu gia client và server, nếu quá thi gian này thì nginx s tt kết ni.
5) Tt Access Logs:
Mc đnh thì Nginx s ghi li các request lên mt file trên đĩa cng như là mt vic ghi logs. Nêu bn không sdng các access logs thì bn có th tt tính năng này đi đ gim bt thi gian nhp xut. Đ thc hin điu này, trong th server ca file cu hình chính nginx.conf bn có th đt giá tr sau
access_logs off;
6) Nén các gói d liu gi đi bng Gzip
Gzip s giúp nén các d liu trưc khi chuyn chúng ti Client. Đây là mt cách đ tăng tc đ tuy cp website ca cúng ta. Trong th http ca file cu hình chính nginx.conf  ta có th thêm
gzip              on;gzip_comp_level   2;gzip_min_length   1000;gzip_proxied      expired no-cache no-store private auth;gzip_types        text/plain application/xml;gzip_disable      “MSIE [1-6].”;
7) Cache ni dung các tp tin tĩnh:
Hu hết các request t client ti website ca chúng ta đ load các nôi dung như: hình nh, java script, css, flash,Chúng ta nên thc hin vic lưu cache li các tp tin có ni dung tĩnh này trên Nginx
location ~* “.(js|ico|gif|jpg|png|css|html|htm|swf|htc|xml|bmp|cur)$” {    root           /home/site/public_html;    add_header      Pragma “public”;    add_header      Cache-Control “public”;    expires        3M;    access_log      off;    log_not_found   off;}
8) n phiên bn ca Nginx:
Vic n đi phiên bn ca Nginx t Server Header s giúp h thng webserver ca chúng ta đưc bo mt tt hơn. Đ thc hin điu này, trong th http ca ca tp tin cu hình chínhnginx.conf ta thêm vào dòng sau
server_tokens off;
9) Thc thi các tp tin PHP thông qua PHP-FPM:
đây ta có th s dng TCP/IP stack mc đnh hoc dùng tr tiếp Unix Socket Connection. Chúng ta cũng có ths dng PHP-FPM đ lng nghe trên IP:Port (thưng là 127.0.0.1:9000).
location ~* .php$ {    try_files       $uri /index.php;    fastcgi_index   index.php;    fastcgi_pass    127.0.0.1:9000;   #fastcgi_pass   unix:/var/run/php-fpm/php-fpm.sock;    include         fastcgi_params;    fastcgi_param  SCRIPT_FILENAME    $document_root$fastcgi_script_name;    fastcgi_param   SCRIPT_NAME       $fastcgi_script_name;}
Chúng ta hoàn toàn có th tách bit PHP-FPM và Nginx chy trên các server khác nhau.
10) Cm các truy cp ti các tp tin n trên Nginx:
Đôi khi trên các thư mc web chúng ta có lưu nhng tp tin n (bt đu vi du chm .”) như .svn, .htaccess. Đây là các tp tin không mang tính  public đi vi ngưi dùng. Đ ngăn chn các truy xut ti các tp tin n này ta có th thêm vào đon cu hình sau
location ~ /. {    access_log off;    log_not_found off;     deny all;}
II – Tối ưu PHP-FPM
1) B trí li các tp tin cu hình:
Thông thưng thì các cu hình ca PHP-FPM đưc thiết lp trong file cu hình /etc/php-fpm.conf và thư m/etc/php-fpm.d. Các tp tin cu hình khác ca PHP-FPM nên đt trong cùng thư mc/etc/php-fpm.d. Chúng ta có th thêm dòng cu hình sau vào file php-fpm.conf đ thc hin điu này
include=/etc/php-fpm.d/*.conf
2) Cu hình nhiu PHP-FPM Pool:
Đi vi PHP-FPM ta có th to ra nhiu pool khác nhau cho các website khác nhau có trên web server. Bng cách này chúng ta có th có đưc các cu hình cp phát tài nguyên và nhóm s hu khác nhau đi vi tn website. Ví d đây mình to 3 pool cho 3 website khác nhau là
/etc/php-fpm.d/site.conf
/etc/php-fpm.d/blog.conf
/etc/php-fpm.d/forums.conf
Các cu hình mu:
/etc/php-fpm.d/site.conf
[site]listen = 127.0.0.1:9000user = sitegroup = siterequest_slowlog_timeout = 5sslowlog = /var/log/php-fpm/slowlog-site.loglisten.allowed_clients = 127.0.0.1pm = dynamicpm.max_children = 5pm.start_servers = 3pm.min_spare_servers = 2pm.max_spare_servers = 4pm.max_requests = 200listen.backlog = -1pm.status_path = /statusrequest_terminate_timeout = 120srlimit_files = 131072rlimit_core = unlimitedcatch_workers_output = yesenv[HOSTNAME] = $HOSTNAMEenv[TMP] = /tmpenv[TMPDIR] = /tmpenv[TEMP] = /tmp
/etc/php-fpm.d/blog.conf
[blog]listen = 127.0.0.1:9001user = bloggroup = blogrequest_slowlog_timeout = 5sslowlog = /var/log/php-fpm/slowlog-blog.loglisten.allowed_clients = 127.0.0.1pm = dynamicpm.max_children = 4pm.start_servers = 2pm.min_spare_servers = 1pm.max_spare_servers = 3pm.max_requests = 200listen.backlog = -1pm.status_path = /statusrequest_terminate_timeout = 120srlimit_files = 131072rlimit_core = unlimitedcatch_workers_output = yesenv[HOSTNAME] = $HOSTNAMEenv[TMP] = /tmpenv[TMPDIR] = /tmpenv[TEMP] = /tmp
/etc/php-fpm.d/forums.conf
[forums]listen = 127.0.0.1:9002user = forumsgroup = forumsrequest_slowlog_timeout = 5sslowlog = /var/log/php-fpm/slowlog-forums.loglisten.allowed_clients = 127.0.0.1pm = dynamicpm.max_children = 10pm.start_servers = 3pm.min_spare_servers = 2pm.max_spare_servers = 4pm.max_requests = 400listen.backlog = -1pm.status_path = /statusrequest_terminate_timeout = 120srlimit_files = 131072rlimit_core = unlimitedcatch_workers_output = yesenv[HOSTNAME] = $HOSTNAMEenv[TMP] = /tmpenv[TMPDIR] = /tmpenv[TEMP] = /tmp
3) Cu hình PHP-FPM Pool Process Manager (pm):
Trong vic qun lý các tiến trình ca PHP-FPM ta nên s dng cách qun lý đng đ ch khi đng nhng tiến trình khi cn thiết. Các cu hình đây cũng tương t như là cu hình các thông sca worker_porcess và worker_connection ca Nginx mà mình đã trình bày trên. Tùy theo lưng truy cp ti website ca chúng ta và dung lưng b nh RAM ca web server hin có mà ta có các cách cu hình cho phù hp.
Gii s Web Server ca chúng ta có 512 MB ram, nhng lúc website có lưng truy cp cao, ta check dung lưng b nh RAM hin đang dùng (bng lnh top chn hn). Dung lưng RAM đưc cp phát cho PHP-FPM là 220 MB, mi tiến trình ca nó s dng 24 MB. Ta có th tính đưc giá tr cmax_children là 220/24 = 9.17.
Vy giá tr pm.max_children ta nên thiết đt cho web server là 9.
Trong file cu hình pool ca website ta có th có cu hình mu như sau:
pm.max_children = 9pm.start_servers = 3pm.min_spare_servers = 2pm.max_spare_servers = 4pm.max_requests = 200
Mc đnh thì sng request mi tiến trình là không b gii hn. Tuy nhiên ta nên thiết đt li nó mt giá trxác đnh đ tránh các vn đ v b nh. Như ví d trên pm.max_requestsđưc gán giá tr là 200.

How to set a default gateway on CentOS

 Hệ thống  Comments Off on How to set a default gateway on CentOS
Sep 042015
 

A default gateway is a remote host or router that your Linux host forwards traffic to when the destination IP address of outgoing traffic does not match any route in your local routing table. Configuring a default gateway on CentOS is quite straightforward.

If you wish to change a default gateway temporarily at run time, you can use ip command.

First things first. To check what default gateway you are using currently:

$ ip route show

192.168.91.0/24 dev eth0  proto kernel  scope link  src 192.168.91.128
169.254.0.0/16 dev eth0  scope link  metric 1002
default via 192.168.91.2 dev eth0 

According to the local routing table shown above, a default gateway is 192.168.91.2, and traffic is forwarded to the gateway via eth0.

In order to change a default gateway to another IP address:

$ sudo ip route replace default via 192.168.91.10 dev eth0

Obviously, a default gateway’s IP address should come from the subnet associated with the interface connected to the default gateway, in this example, 192.168.91.0/24. Otherwise, the command will fail with the following error.

RTNETLINK answers: No such process

Also, keep in mind that the default route change made by ip command will be lost after rebooting.

In order to set a default gateway permanently on CentOS, you will need to update /etc/sysconfig/network accordingly.

$ sudo vi /etc/sysconfig/network

GATEWAY=192.168.91.10

Again, be aware that the IP addressed specified here should match with the subnet (192.168.91.0/24) associated with a default route interface.

Another option to set a default gateway persistently on CentOS is to edit /etc/sysconfig/network-scripts/ifcfg-<default_interface_name>, and add “GATEWAY=<gateway_ip>” there. If the default interface is “eth0”, you will need to edit /etc/sysconfig/network-scripts/ifcfg-eth0. If you choose to use this method, you need to refer to this post to get familiar with this option.

Whether you edit /etc/sysconfig/network or /etc/sysconfig/network-scripts/ifcfg-ethX, don’t forget to restart networkservice as follows, or reboot your CentOS for the change to take effect.

Install Redis on CentOS 6.5

 Hệ thống  Comments Off on Install Redis on CentOS 6.5
Sep 042015
 

Perform an update to ensure you’ve got the latest of everything in the base package.

yum update

Install wget so you can download a few things.

yum install wget

Allow yum to locate/install redis, per this page here.

wget http://dl.fedoraproject.org/pub/epel/6/x86_64/epel-release-6-8.noarch.rpm
wget http://rpms.famillecollet.com/enterprise/remi-release-6.rpm
rpm -Uvh remi-release-6*.rpm epel-release-6*.rpm"

Now, install all the prerequisites

yum install tar make automake gcc gcc-c++ git net-tools libcurl-devel libxml2-devel libffi-devel libxslt-devel tcl redis ImageMagick npm mysql-server mysql-devel nginx libyaml libyaml-devel patch readline-devel libtool bison

Enable and start MySQL

chkconfig --level 3 mysqld on
service mysqld start

Secure your MySQL installation by setting a password. replace ‘new-password’ with your secure password.

mysqladmin -u root password 'new-password'
mysqladmin -u root -h YourHost.YourDomain.com password 'new-password'

Open up the necessary firewall ports

vi /etc/sysconfig/iptables
  copy this line.
    -A INPUT -m state --state NEW -m tcp -p tcp --dport 22 -j ACCEPT
  and add two more with port 80 & 443 as well
    -A INPUT -m state --state NEW -m tcp -p tcp --dport 80 -j ACCEPT
    -A INPUT -m state --state NEW -m tcp -p tcp --dport 443 -j ACCEPT

Restart the firewall

service iptables restart