Step 1: Start TeamViewer
You must enter Your name, then click Start instant meeting. Your screen
You must enter Your name, then click Start instant meeting. Your screen
[mariadb]
name = MariaDB
baseurl = http://yum.mariadb.org/10.0/centos6-amd64
gpgkey=https://yum.mariadb.org/RPM-GPG-KEY-MariaDB
gpgcheck=1
[mariadb]
name = MariaDB
baseurl = http://yum.mariadb.org/10.0/centos6-x86
gpgkey=https://yum.mariadb.org/RPM-GPG-KEY-MariaDB
gpgcheck=1
# yum install MariaDB-Galera-server MariaDB-client galera
# service mysql start
# mysql_secure_installation
# mysql -u root -p

MariaDB [(none)]> GRANT ALL PRIVILEGES ON *.* TO 'cluster'@'%' IDENTIFIED BY 'password' WITH GRANT OPTION;
MariaDB [(none)]> FLUSH PRIVILEGES;
MariaDB [(none)]> exit
# service mysql stop
[root@db1 ~]# vim /etc/my.cnf.d/server.cnf
query_cache_size=0
binlog_format=ROW
default_storage_engine=innodb
innodb_autoinc_lock_mode=2
wsrep_provider=/usr/lib/galera/libgalera_smm.so
wsrep_cluster_address="gcomm://192.168.1.10,192.168.1.20,192.168.1.30"
wsrep_cluster_name='cluster1'
wsrep_node_address='192.168.1.10'
wsrep_node_name='db1'
wsrep_sst_method=rsync
wsrep_sst_auth=cluster:password
[root@db1 ~]# /etc/init.d/mysql bootstrap
Bootstrapping the clusterStarting MySQL.... SUCCESS!
[root@db2 ~]# vim /etc/my.cnf.d/server.cnf
query_cache_size=0
binlog_format=ROW
default_storage_engine=innodb
innodb_autoinc_lock_mode=2
wsrep_provider=/usr/lib/galera/libgalera_smm.so
wsrep_cluster_address="gcomm://192.168.1.10,192.168.1.20,192.168.1.30"
wsrep_cluster_name='cluster1'
wsrep_node_address='192.168.1.20'
wsrep_node_name='db2'
wsrep_sst_method=rsync
wsrep_sst_auth=cluster:password
[root@db2 ~]# /etc/init.d/mysql start
Starting MySQL..... SUCCESS!
[root@db3 ~]# vim /etc/my.cnf.d/server.cnf
query_cache_size=0
binlog_format=ROW
default_storage_engine=innodb
innodb_autoinc_lock_mode=2
wsrep_provider=/usr/lib/galera/libgalera_smm.so
wsrep_cluster_address="gcomm://192.168.1.10,192.168.1.20,192.168.1.30"
wsrep_cluster_name='cluster1'
wsrep_node_address='192.168.1.30'
wsrep_node_name='db2'
wsrep_sst_method=rsync
wsrep_sst_auth=cluster:password
[root@db3 ~]# /etc/init.d/mysql start
Starting MySQL..... SUCCESS!
1. System Requirements for Zimbra Collaboration
Evaluation and Testing
• Intel/AMD 64-bit CPU 1.5 GHz
• RAM requirements:
• For single server installations, a minimum of 8GB of RAM is required.
• For multi-server installations, contact Zimbra sales for recommendations.
• 5 GB free disk space for software and logs
• Temp file space for installs and upgrades*
• Additional disk space for mail storage Production environments
• Intel/AMD 2.0 GHZ+ 64-bit CPU
• RAM requirements:
• For single server installations, a minimum of 8GB of RAM is required.
• For multi-server installations, contact Zimbra sales for recommendations.
• Temp file space for installs and upgrades*
• 10 GB free disk space for software and logs (SATAor SCSI for performance, and RAID/Mirroring for redundancy)
• Additional disk space for mail storage
*Temp files space: The zimbra-store requires 5GB for / opt/zimbra, plus additional space for mail storage. Theother nodes require 100MB. General Requirements
• Firewall Configuration should be set to “No firewall”.
• RAID-5 is not recommended for installations with more than 100 accounts.
2. Install zimbra
a. Install some pack pre-requisites, we using command:
and remove postfix if it installed.
b. Now we must change hostname, warming we must reboot server after change hostname.
c. Download zimbra from home page, we using command:
then download complete, we extra using command for example
d. Install Zimbra using command:
if you see error on this picture
we install perl-core
Press Yes for confirm install zimbra on your system.
This picture is during install zimbra on centos 7
You should change domain, for example your email is [email protected], you press sysadmin.com.vn
After install, you must config zimbra, one important is password for user admin
Press ‘a’ to next
System automatic set default value
And install finish.
You can access webclient from web browse
And this is user interface
Good luck for you 🙂
Read more: http://www.itzgeek.com/tech-infos/virualization/what-is-xen%c2%ae.html#ixzz3E1hfSV7E
© 2012 Geek Site. All rights reserved.
Create database called “clouddb” Configure Apache server:
Read more: http://www.itzgeek.com/how-tos/linux/centos-how-tos/install-owncloud-7-on-centos-7-rhel-7.html#ixzz3E1WKqMLv Download and Setup:
Create Database:
torial on Securing MariaDB. MariaDB server must be started before creating the database, login to MySQL server.
Open up web browser, point a URL to http://your-ip-address/owncloud ( http://Your-custom-domain). Browser will automatically take you to ownCloud setup page where it must be configured before going to live. Enter admin user name, password, data folder location and database details. You can choose any one of the database from SQLite or MySQL. If you choose SQLite database, you do not require to enter database details. where as MySQL database requires database user, password and data base name.
© 2012 Geek Site. All rights reserved.
System administrators. IT pros. The IT guy (or IT gal). Techies. They go by a lot of names, but they all pretty much share a common goal: be the fantastic fixers of all things tech. After all, if weren’t for sysadmins, making copies would require a trusty pen, a steady hand, and a ton of patience.
SysAdmins are always on call, whether it’s updating your company’s antivirus software, replacing that toner waste cartridge or repairing a corrupt SQL database. Here’s a bunch of other tasks IT pros do that you might not have even realized:
So if you’re able to read all of this, thank your SysAdmin — and know he or she is only one in a tech army bringing you the email from your aunt on the West Coast, the instant message from your son at college, the free phone call from the friend in Australia, and this very webpage.
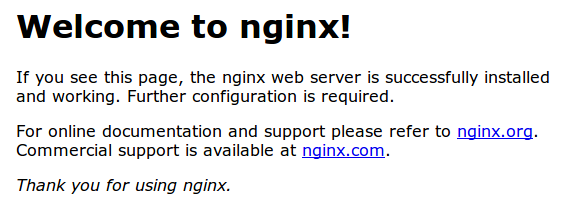
yum command:systemctl start nginx.service
http://server_domain_name_or_IP/

sudo systemctl enable nginx.service
/usr/share/nginx/html. Files that are placed in there will be served on your web server. This location is specified in the default server block configuration file that ships with Nginx, which is located at/etc/nginx/conf.d/default.conf./etc/nginx/conf.d. Files that end with .conf in that directory will be loaded when Nginx is started./etc/nginx/nginx.conf. This is where you can change settings like the user that runs the Nginx daemon processes, and the number of worker processes that get spawned when Nginx is running, among other things.To install the Redis on Ubuntu, go to terminal and type the following commands:
$sudo apt-get update
$sudo apt-get install redis-server
This will install redis on your machine.
Start Redis
$redis-server
Check if redis is working?
$redis-cli
This will open a redis prompt, as shown below:
redis 127.0.0.1:6379>
In the above prompt 127.0.0.1 is your machine’s IP address and 6379 is port on which redis server is running. Now type the PING command as shown below.
redis 127.0.0.1:6379> ping
PONG
This shows that you have successfully installed redis on your machine.
To install redis dessktop manager on ubuntu, just download the package from http://redisdesktop.com/download Open the downloaded package and install it.
Redis desktop manager will give you UI to manage your redis keys and data.